Is there an advantage to that? More sanitary?mr x wrote:Sounds like a half ball.
Brewha 3-in-1 kettle & jacketed conical (BIAC)
-
Jimmy
- Site Admin Award Winner

- Posts: 6984
- Joined: Wed Sep 22, 2010 6:35 pm
- Location: Halifax, NS
Re: Brewha 3-in-1 kettle & jacketed conical
-
mr x

- Mod Award Winner

- Posts: 13764
- Joined: Fri Sep 24, 2010 5:30 pm
- Location: Halifax/New Glasgow
Re: Brewha 3-in-1 kettle & jacketed conical
I'm not sure that's the design, not a lot of schematics out there. More sanitary is a bit relative. I think the idea would be not to have trapped liquid in the ball.
At Alexander Keith's we follow the recipes first developed by the great brewmaster to the absolute letter. 
-
mr x
- Mod Award Winner
- Posts: 13764
- Joined: Fri Sep 24, 2010 5:30 pm
- Location: Halifax/New Glasgow
Re: Brewha 3-in-1 kettle & jacketed conical
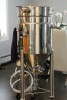
Here's my 4700watt heat stick. 5/8" OD, will drop through the top with an extension tube that will thread into a triclamp fitting.
Sent from my Nexus 4 using Tapatalk 4
Sent from my Nexus 4 using Tapatalk 4
You do not have the required permissions to view the files attached to this post.
At Alexander Keith's we follow the recipes first developed by the great brewmaster to the absolute letter.
-
Jimmy
- Site Admin Award Winner
- Posts: 6984
- Joined: Wed Sep 22, 2010 6:35 pm
- Location: Halifax, NS
Re: Brewha 3-in-1 kettle & jacketed conical
Rob, what would it take to install one of those through a 2" triclover? Is that what you're talking about doing?
Just wondering about possibilities for a fully stainless element in the conical.
Just wondering about possibilities for a fully stainless element in the conical.
-
mr x
- Mod Award Winner
- Posts: 13764
- Joined: Fri Sep 24, 2010 5:30 pm
- Location: Halifax/New Glasgow
Re: Brewha 3-in-1 kettle & jacketed conical
There's a lot of different ways to do it. For this, I'll add a piece of extension tubing up to the top, and then have a triclover blank tapped for 1/2" npt and use another swagelok fitting to secure it into the blank.
Sent from my Nexus 4 using Tapatalk 4
Sent from my Nexus 4 using Tapatalk 4
At Alexander Keith's we follow the recipes first developed by the great brewmaster to the absolute letter.
-
Jimmy
- Site Admin Award Winner
- Posts: 6984
- Joined: Wed Sep 22, 2010 6:35 pm
- Location: Halifax, NS
Re: Brewha 3-in-1 kettle & jacketed conical
They did a blog post about brewing with the BIAC. I'm getting excited to get this thing up and running - and start to have some beer on tap again!
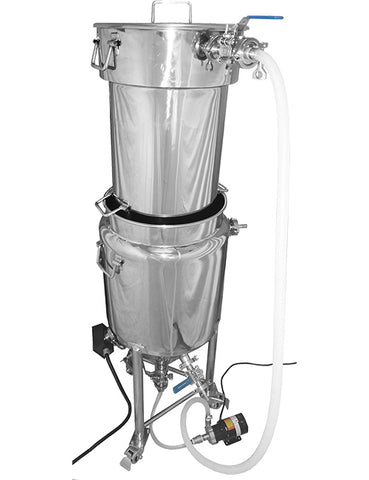
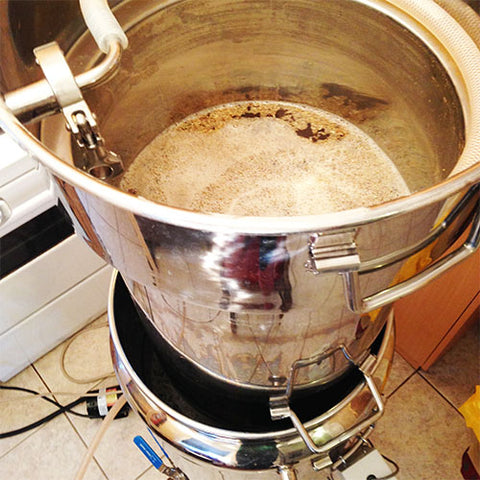
The purpose of the BREWHA BIAC system (Brew In A Colander) is to provide home brewers with a more enjoyable brewing experience by giving maximum control and superior results while simplifying the brewing process and reducing equipment requirements and expense. All of the brewing (heating, mashing, boiling, chilling, fermenting) occurs in just one vessel, the 3-in-1, and the entire brewing process with full mashing can occur in just over 4 hours. The following provides a brief overview of the BIAC process.
1. Water for mashing the grain ('strike water') is added to the 3-in-1 and heated to initial mashing or 'strike temperature'. Water volume is generally measured based on full boil volume. However, unlike a brew-in-a-bag system, an added benefit of the mash colander is that a portion of water can be withheld and added as rinsing or sparge water once the mash colander is lifted out of the 3-in-1.
Heatup: 30 minutes

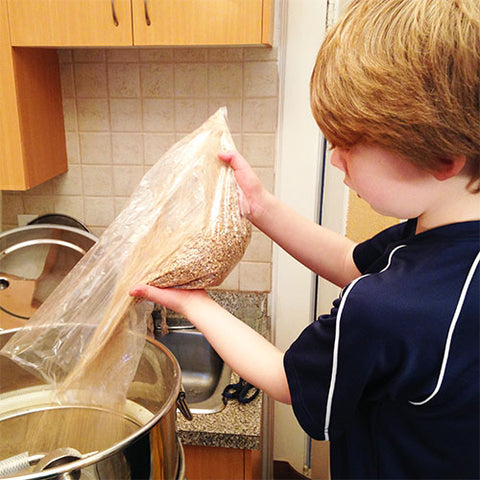
2. The mash colander is inserted in the 3-in-1 and grain is added; after mashing-in, the grain can be stirred occasionally to ensure it is not compacting (especially important if you are running the circulating pump throughout the mash period).
Mashing: 60-90 minutes
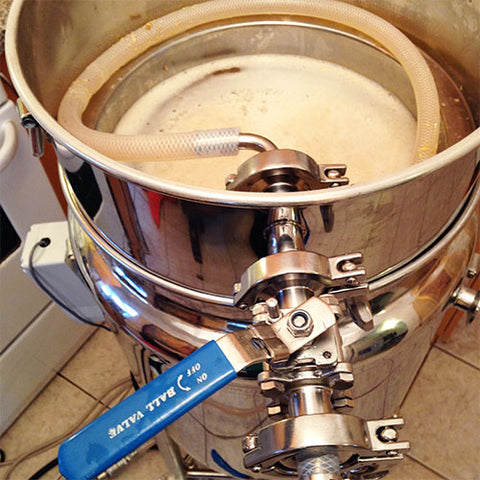
3. Vorlauf (circulating the wort out of the bottom of the 3-in-1 and back in the top through the mash colander) typically occurs at the end of the mash period to help clarify the beer. The grain in the mash colander forms a filter than captures small particles as the water passes down through the grain bed and is circulated back to the top. Depending on the power of the pump, wort flow may need to be throttled (by partially closing a downstream valve) in order to ensure that the grain bed does not compact. (Recirculating the wort throughout the entire mash period or at several intervals can also be employed to help maintain even temperature in the mash and improve sugar/enzyme interaction.)
4. When mashing is complete, the mash colander is lifted and the lower handles folded out to rest on the top of the 3-in-1. The wort runs out of the spent grain and into the 3-in-1. Sparge water can be added to rinse the grain and increase boil volume. The heating element is turned on full power to heat the wort up to boiling.
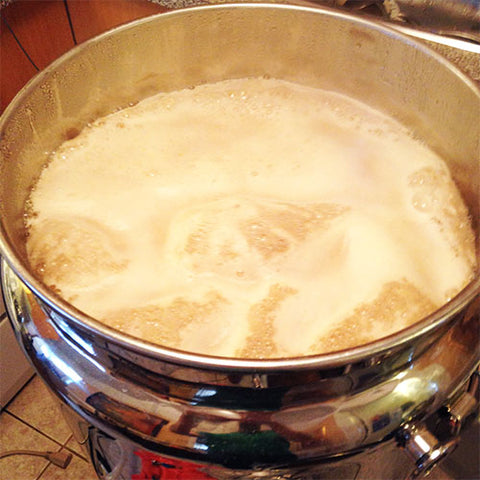
5. Boiling improves the flavor and kills microbes. Hops can be introduced after hot break using the hop basket.
Boil time: 60 minutes
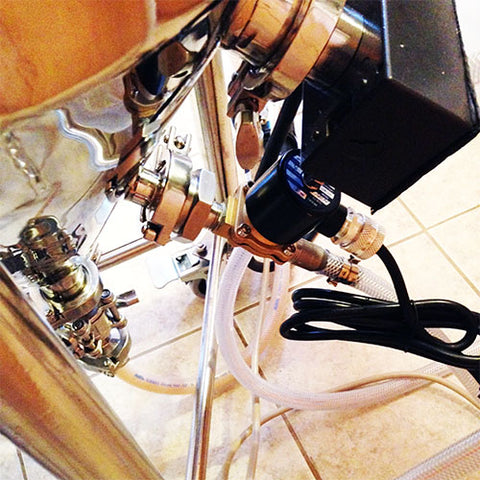
6. Once boiling is complete, a chilling liquid (e.g., cold tap water) is run through the 3-in-1 jacket. To reduce chilling time and ensure even temperature throughout the fermenter, the Chugger pump system can circulate wort in the fermenter by pulling it out the side or bottom port and putting it back into the fermenter through the other. **If this step is used, it is important to also circulate the pump during the boil period in order to sanitize the hoses and pump with the boiling wort.**
Chilling time: About 30 minutes (depending on chilling water temperature and flow rate).

7. The Chilling Water Controller is used (in conjunction with an ETC) to regulate water into the 3-in-1 jacket. When the target temperature is attained, the controller valve closes and the flow of fluid into the jacket is stopped. This is useful during the initial chill, so one can program the desired pitching temperature and not have to supervise it, and during fermentation to precisely maintain temperatures inside the fermenter.
8. When the wort reaches yeast-pitching temperature, the fermenter is allowed to sit for 10 minutes to allow protein to settle to the bottom of the fermenter, where it can be removed. The rest also ensures even distribution of temperature inside the fermenter to avoid any possibility of yeast shock.

And that's it. Full control, best results, and all in less space and with less equipment than ever before.
If you have had experiences with the BREWHA BIAC that you would like to share, or if you have any questions, we would love to hear from you.
http://brewha.co/blogs/brewhablog/13081 ... n-the-biac" onclick="window.open(this.href);return false;
The purpose of the BREWHA BIAC system (Brew In A Colander) is to provide home brewers with a more enjoyable brewing experience by giving maximum control and superior results while simplifying the brewing process and reducing equipment requirements and expense. All of the brewing (heating, mashing, boiling, chilling, fermenting) occurs in just one vessel, the 3-in-1, and the entire brewing process with full mashing can occur in just over 4 hours. The following provides a brief overview of the BIAC process.
1. Water for mashing the grain ('strike water') is added to the 3-in-1 and heated to initial mashing or 'strike temperature'. Water volume is generally measured based on full boil volume. However, unlike a brew-in-a-bag system, an added benefit of the mash colander is that a portion of water can be withheld and added as rinsing or sparge water once the mash colander is lifted out of the 3-in-1.
Heatup: 30 minutes
2. The mash colander is inserted in the 3-in-1 and grain is added; after mashing-in, the grain can be stirred occasionally to ensure it is not compacting (especially important if you are running the circulating pump throughout the mash period).
Mashing: 60-90 minutes
3. Vorlauf (circulating the wort out of the bottom of the 3-in-1 and back in the top through the mash colander) typically occurs at the end of the mash period to help clarify the beer. The grain in the mash colander forms a filter than captures small particles as the water passes down through the grain bed and is circulated back to the top. Depending on the power of the pump, wort flow may need to be throttled (by partially closing a downstream valve) in order to ensure that the grain bed does not compact. (Recirculating the wort throughout the entire mash period or at several intervals can also be employed to help maintain even temperature in the mash and improve sugar/enzyme interaction.)
4. When mashing is complete, the mash colander is lifted and the lower handles folded out to rest on the top of the 3-in-1. The wort runs out of the spent grain and into the 3-in-1. Sparge water can be added to rinse the grain and increase boil volume. The heating element is turned on full power to heat the wort up to boiling.
5. Boiling improves the flavor and kills microbes. Hops can be introduced after hot break using the hop basket.
Boil time: 60 minutes
6. Once boiling is complete, a chilling liquid (e.g., cold tap water) is run through the 3-in-1 jacket. To reduce chilling time and ensure even temperature throughout the fermenter, the Chugger pump system can circulate wort in the fermenter by pulling it out the side or bottom port and putting it back into the fermenter through the other. **If this step is used, it is important to also circulate the pump during the boil period in order to sanitize the hoses and pump with the boiling wort.**
Chilling time: About 30 minutes (depending on chilling water temperature and flow rate).
7. The Chilling Water Controller is used (in conjunction with an ETC) to regulate water into the 3-in-1 jacket. When the target temperature is attained, the controller valve closes and the flow of fluid into the jacket is stopped. This is useful during the initial chill, so one can program the desired pitching temperature and not have to supervise it, and during fermentation to precisely maintain temperatures inside the fermenter.
8. When the wort reaches yeast-pitching temperature, the fermenter is allowed to sit for 10 minutes to allow protein to settle to the bottom of the fermenter, where it can be removed. The rest also ensures even distribution of temperature inside the fermenter to avoid any possibility of yeast shock.
And that's it. Full control, best results, and all in less space and with less equipment than ever before.
If you have had experiences with the BREWHA BIAC that you would like to share, or if you have any questions, we would love to hear from you.
http://brewha.co/blogs/brewhablog/13081 ... n-the-biac" onclick="window.open(this.href);return false;
-
Jimmy
- Site Admin Award Winner
- Posts: 6984
- Joined: Wed Sep 22, 2010 6:35 pm
- Location: Halifax, NS
Re: Brewha 3-in-1 kettle & jacketed conical
Back to the electrical. I'm going to stick with the standard 30A outlet - does the amperage on the GFCI breaker matter, as long as I'm at 30 or above? I was thinking 40A breaker, but would 30, 50, 60 be ok as well? Just wondering what my options are.
-
LeafMan66_67

- Award Winner 2

- Posts: 4600
- Joined: Fri Mar 02, 2012 7:10 am
- Name: Derek Stapleton
- Location: Lower Sackville, NS
Re: Brewha 3-in-1 kettle & jacketed conical
Code wise, as you increase your breaker size, you will need to adjust your wire size accordingly, adding a bit more cost. Depending on the electrical inspector, they may have an issue with a 50 or 60A breaker in front of a 30A receptacle.Jimmy wrote:Back to the electrical. I'm going to stick with the standard 30A outlet - does the amperage on the GFCI breaker matter, as long as I'm at 30 or above? I was thinking 40A breaker, but would 30, 50, 60 be ok as well? Just wondering what my options are.
"He was a wise man who invented beer." - Plato
-
Jimmy
- Site Admin Award Winner
- Posts: 6984
- Joined: Wed Sep 22, 2010 6:35 pm
- Location: Halifax, NS
Re: Brewha 3-in-1 kettle & jacketed conical
So that's really the only change I have to worry about? Is there any reason to go with a 30A vs a 40,50 or 60?LeafMan66_67 wrote:Code wise, as you increase your breaker size, you will need to adjust your wire size accordingly, adding a bit more cost. Depending on the electrical inspector, they may have an issue with a 50 or 60A breaker in front of a 30A receptacle.Jimmy wrote:Back to the electrical. I'm going to stick with the standard 30A outlet - does the amperage on the GFCI breaker matter, as long as I'm at 30 or above? I was thinking 40A breaker, but would 30, 50, 60 be ok as well? Just wondering what my options are.
-
LeafMan66_67
- Award Winner 2
- Posts: 4600
- Joined: Fri Mar 02, 2012 7:10 am
- Name: Derek Stapleton
- Location: Lower Sackville, NS
Re: Brewha 3-in-1 kettle & jacketed conical
If you upsize your breaker to 40 or 50A, you will need to adjust the wire and receptacle type accordingly.
Just browsing back through this thread and both X and AllanMar make good points for upgrading to a 40 or 50A service for your brew control panel with a 50A range type receptacle. It's only money!
Just browsing back through this thread and both X and AllanMar make good points for upgrading to a 40 or 50A service for your brew control panel with a 50A range type receptacle. It's only money!
"He was a wise man who invented beer." - Plato
-
AllanMar
- Verified User

- Posts: 719
- Joined: Sun Mar 25, 2012 5:16 pm
- Name: Allan
- Location: Dartmouth, NS
Re: Brewha 3-in-1 kettle & jacketed conical
LeafMan66_67 wrote:Code wise, as you increase your breaker size, you will need to adjust your wire size accordingly, adding a bit more cost. Depending on the electrical inspector, they may have an issue with a 50 or 60A breaker in front of a 30A receptacle.Jimmy wrote:Back to the electrical. I'm going to stick with the standard 30A outlet - does the amperage on the GFCI breaker matter, as long as I'm at 30 or above? I was thinking 40A breaker, but would 30, 50, 60 be ok as well? Just wondering what my options are.
I would have thought the same. It's pretty common in Natural Gas homes (like mine) to install a 115V duplex outlet (for gas appliances) at the range/dryer in addition to the 40A/30A range/dryer outlet (fed from same 40/30A breaker). I always meant to read up on the code of this, as it seems like it wouldn't be allowed (and perhaps isn't?).
If you only want 30A then stick with 30A everything. As sometimes 40/50A gfci's are more common seems like some people will put a lower amperage regular breaker in their panel (say 30A) then use a 50A spa panel to provide GFCI only protection.
If you end up finding any decent prices for a 50A GFCI breaker/spa panel, let me know. Mine is toast (gotta try warranty), got it at HD in the US for $55 and can't bring myself to pay $200+ for one here.
-
Jimmy
- Site Admin Award Winner
- Posts: 6984
- Joined: Wed Sep 22, 2010 6:35 pm
- Location: Halifax, NS
Re: Brewha 3-in-1 kettle & jacketed conical
Thanks Allan. My biggest reason for wondering was because I'm not sure of the availability/pricing of one vs the other.AllanMar wrote: I would have thought the same. It's pretty common in Natural Gas homes (like mine) to install a 115V duplex outlet (for gas appliances) at the range/dryer in addition to the 40A/30A range/dryer outlet (fed from same 40/30A breaker). I always meant to read up on the code of this, as it seems like it wouldn't be allowed (and perhaps isn't?).
If you only want 30A then stick with 30A everything. As sometimes 40/50A gfci's are more common seems like some people will put a lower amperage regular breaker in their panel (say 30A) then use a 50A spa panel to provide GFCI only protection.
If you end up finding any decent prices for a 50A GFCI breaker/spa panel, let me know. Mine is toast (gotta try warranty), got it at HD in the US for $55 and can't bring myself to pay $200+ for one here.
Sent from my Nexus 10 using Tapatalk
-
Jimmy
- Site Admin Award Winner
- Posts: 6984
- Joined: Wed Sep 22, 2010 6:35 pm
- Location: Halifax, NS
Re: Brewha 3-in-1 kettle & jacketed conical
They just released a couple videos of the BIAC in use during a brew day
Full Version
Short Version
Full Version
Short Version
-
Jimmy
- Site Admin Award Winner
- Posts: 6984
- Joined: Wed Sep 22, 2010 6:35 pm
- Location: Halifax, NS
Re: Brewha 3-in-1 kettle & jacketed conical (BIAC)
I received word this week that they are planning to ship this the week of May 25th. Can't wait to get back to brewing. The only thing I'll need to brew will be the 220V GFCI outlet, would like to get a sink and range hood hooked up as well, though. 
-
GuingesRock

- Award Winner 20+

- Posts: 5190
- Joined: Wed May 29, 2013 2:26 pm
- Name: Mark
- Location: Wolfville, NS
Re: Brewha 3-in-1 kettle & jacketed conical (BIAC)
Are you getting a colander? if so, does it have a mesh bottom fine enough to use it as a giant hop basket during the boil?
-Mark
2nd place, Canadian Brewer of the Year, 2015
101 awards won for beers designed and brewed.
Cicerone Program - Certified Beer Server
2nd place, Canadian Brewer of the Year, 2015
101 awards won for beers designed and brewed.
Cicerone Program - Certified Beer Server
-
Jimmy
- Site Admin Award Winner
- Posts: 6984
- Joined: Wed Sep 22, 2010 6:35 pm
- Location: Halifax, NS
Re: Brewha 3-in-1 kettle & jacketed conical (BIAC)
Yes, it's coming with everything. It's likely too coarse to filter hops (pellet hops - it would likely work for leaf hops). I'm just going to toss the pellet hops directly in the kettle and dump them from the bottom valve after the boil.
-
McGruff

- Registered User

- Posts: 627
- Joined: Wed Feb 29, 2012 8:46 am
- Name: Chris Storey
- Location: Cavan, Ontario
Re: Brewha 3-in-1 kettle & jacketed conical (BIAC)
Any room in the kettle for a hopstopper?
-
Jimmy
- Site Admin Award Winner
- Posts: 6984
- Joined: Wed Sep 22, 2010 6:35 pm
- Location: Halifax, NS
Re: Brewha 3-in-1 kettle & jacketed conical (BIAC)
Not sure, but it would have to stay in there during the ferment and might be a little messy. Dumping the hops/trub out of the bottom won't be a problem.McGruff wrote:Any room in the kettle for a hopstopper?
-
mr x
- Mod Award Winner
- Posts: 13764
- Joined: Fri Sep 24, 2010 5:30 pm
- Location: Halifax/New Glasgow
Re: Brewha 3-in-1 kettle & jacketed conical (BIAC)
I'm still not convinced a hop bomb will dump based on the consistency of the stuff I've dug out of my BK's, but you'll find out. 
I've been fully drained of wort though when digging it out, so the sludge may have compacted much more in my case.
I've been fully drained of wort though when digging it out, so the sludge may have compacted much more in my case.
At Alexander Keith's we follow the recipes first developed by the great brewmaster to the absolute letter.
-
Jimmy
- Site Admin Award Winner
- Posts: 6984
- Joined: Wed Sep 22, 2010 6:35 pm
- Location: Halifax, NS
Re: Brewha 3-in-1 kettle & jacketed conical (BIAC)
We shall see. Nash, seems to think it won't be an issue. I'd think a little push with co2 would fix a hop plug
Sent from my Android using Tapatalk.
Sent from my Android using Tapatalk.
-
RubberToe

- Award Winner 13

- Posts: 3743
- Joined: Mon Mar 14, 2011 9:47 am
- Name: Rob
- Location: Dartmouth
- Contact:
Re: Brewha 3-in-1 kettle & jacketed conical (BIAC)
Yeah just don't let it compact. This is something I have to figure out as well for the conical, a schedule for dumping trub, hops, yeast, and maybe more hops if doing an aggressive dry hop.
I get a tonne of trub, I figure I'll dump it a day or two in.
I get a tonne of trub, I figure I'll dump it a day or two in.
Electric Brewery Build
On tap at RubberToe's:
Sometimes on a Sunday Belgian Dubbel, Oaked Old Ale, Ordinary Bitter
On tap at RubberToe's:
Sometimes on a Sunday Belgian Dubbel, Oaked Old Ale, Ordinary Bitter
-
Jimmy
- Site Admin Award Winner
- Posts: 6984
- Joined: Wed Sep 22, 2010 6:35 pm
- Location: Halifax, NS
Re: Brewha 3-in-1 kettle & jacketed conical (BIAC)
You do not have the required permissions to view the files attached to this post.
-
TimG
- Verified User
- Posts: 1414
- Joined: Sun Feb 13, 2011 10:38 am
- Name: Tim Gallant
- Location: Kingston, ON
-
mr x
- Mod Award Winner
- Posts: 13764
- Joined: Fri Sep 24, 2010 5:30 pm
- Location: Halifax/New Glasgow
Re: Brewha 3-in-1 kettle & jacketed conical (BIAC)
Woo hoo 
Sent from my Nexus 4 using Tapatalk 4
Sent from my Nexus 4 using Tapatalk 4
At Alexander Keith's we follow the recipes first developed by the great brewmaster to the absolute letter.
-
jeffsmith

- Verified User
- Posts: 4922
- Joined: Tue Apr 26, 2011 4:18 pm
- Name: Jeff Smith
- Location: Amherst, NS
- Contact:
Who is online
Users browsing this forum: No registered users and 4 guests