Relic's Adventures into Homebrewing

A spot to talk general homebrew
User avatar
Relic
Registered User
Registered User
Posts: 58
Joined: Sun Mar 04, 2012 1:41 am

Relic's Adventures into Homebrewing

Post by Relic » Tue Mar 20, 2012 5:37 pm

So, I've started to gather up some gear. Picked up a very basic starter kit at the Co-op (Supermarket), enough to get me started until I get to a real brewing store. Also picked up a can of Cooper's Real Ale extract and a 1 KG bag of Corn Sugar.

But before I can get into that, gotta set-up shop. It is my intention to do everything out in the garage.
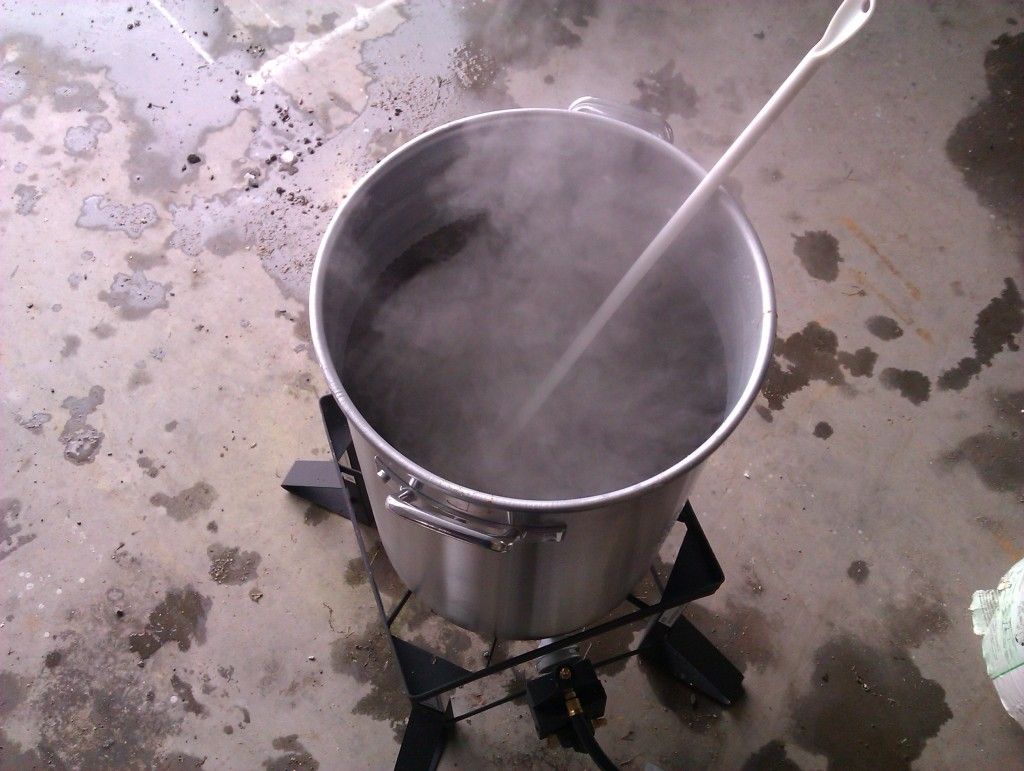
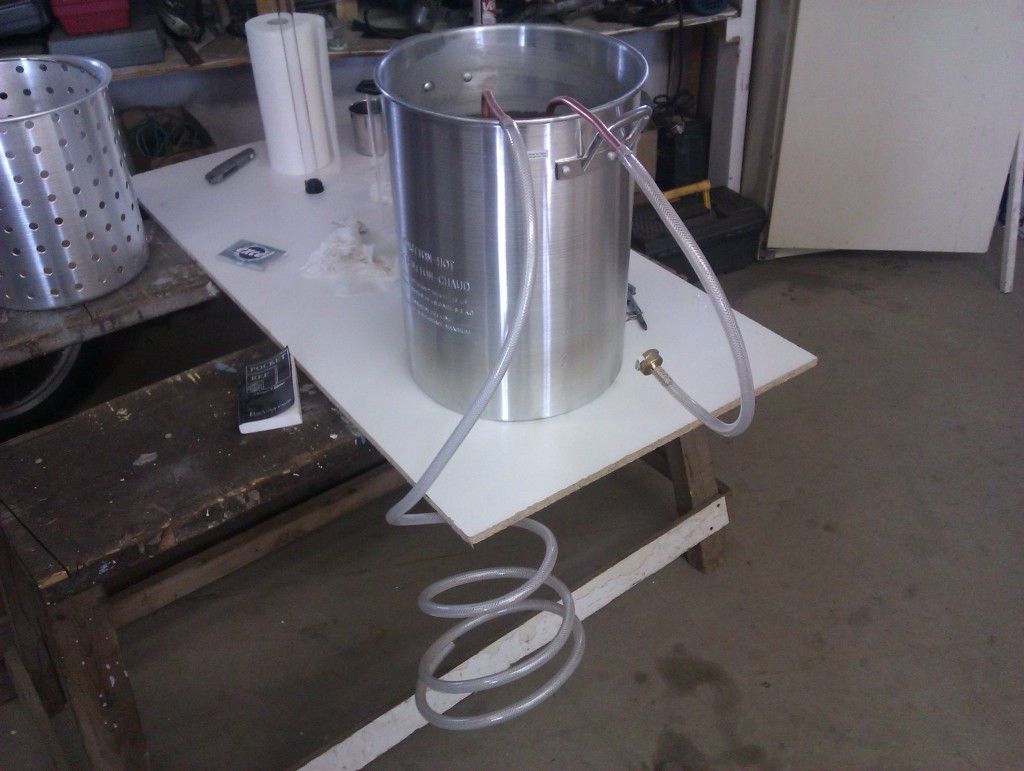
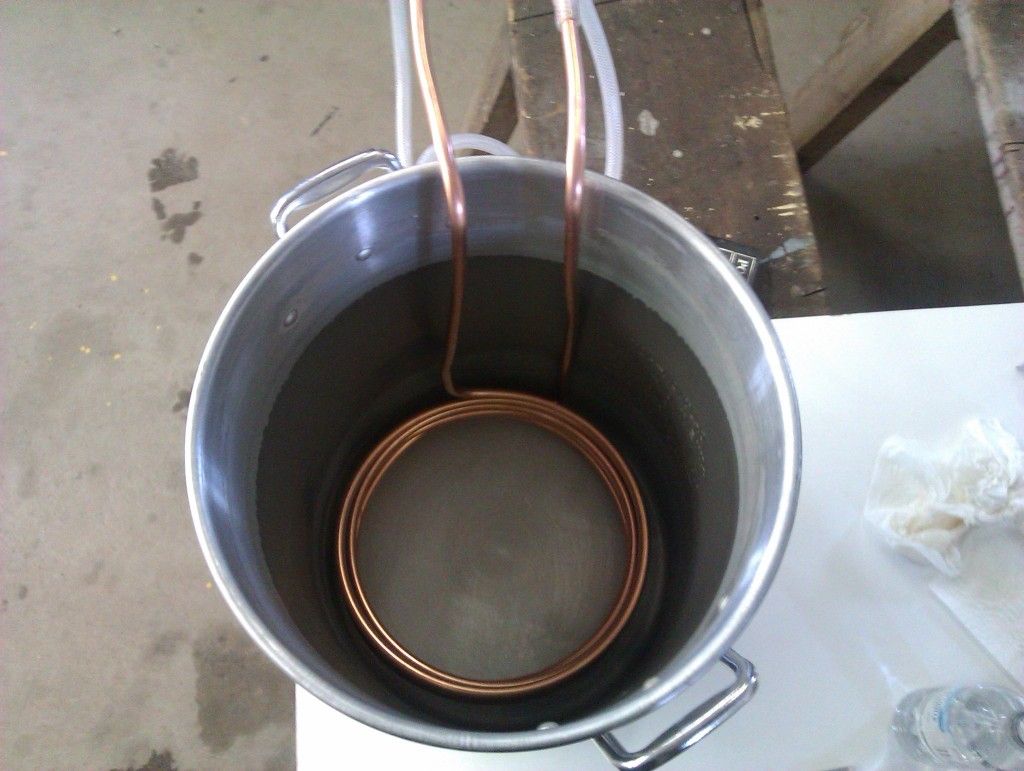
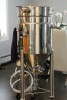
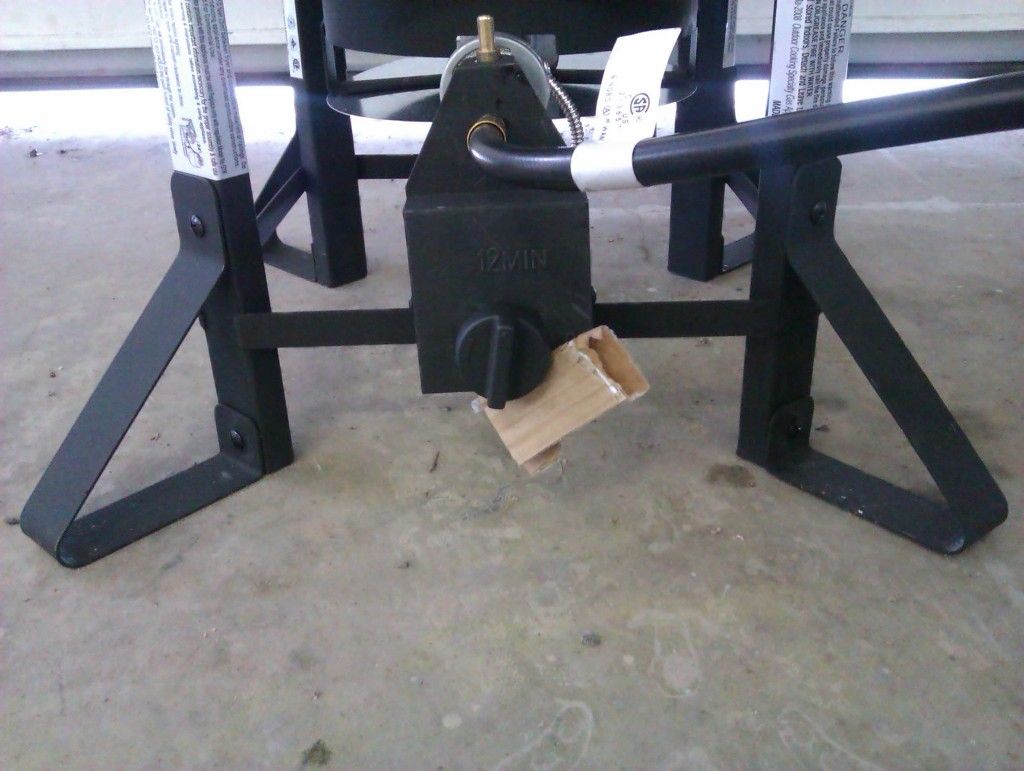
First thing I got was the 36 Qt turkey fryer that went on sale this week. Filled the pot with water and brought to a boil. Kept boiling for 30 minutes to put some sorta coating on the inside of the pot.( Remember reading that somewhere):
Image

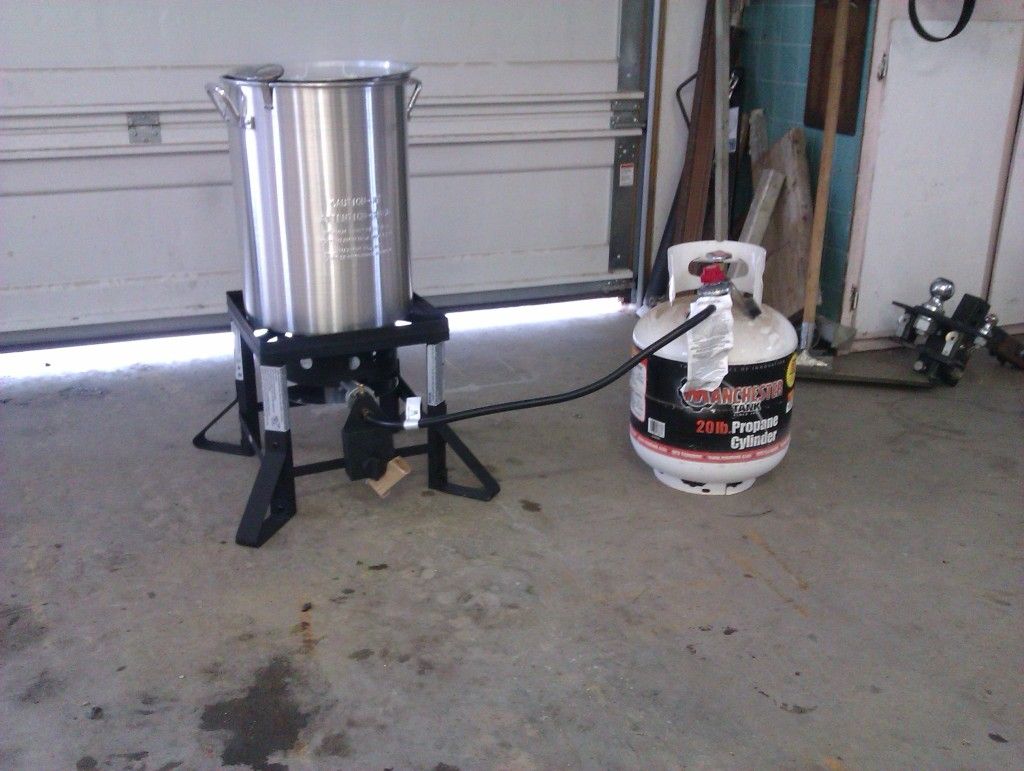
One thing about the new fryer is the 12 minute timer...it's a pain in the posterior. However with my clever device (a piece of cardboard) I was able to overcome that obstacle, by jamming the timer to prevent the countdown:
Image

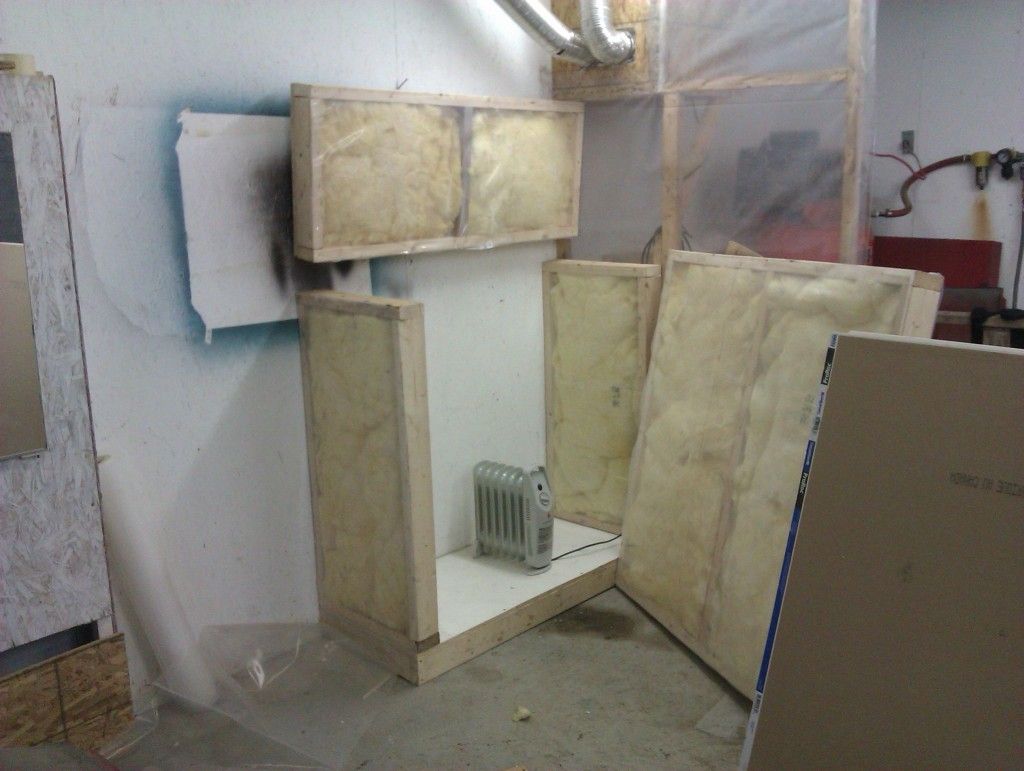
Ok, next up: The garage is quite chilly considering I never have any heat on out there. So, I decided to make a small fermentation room. 4 feet wide, 4 feet high, and 20 inches deep. Floor has 3 inches of styrofoam, and the walls are R12 fibreglass insulation. Here she be in all her glory:
Image

Not that pretty yet. I ran out of 2 x 4 so the front is just a panel for now until I can turn into doors. I will also finish the outside with some gyproc I have around.
One feature I have is a swing up lid for easier access to full buckets/carboys. Later on I may install a double pulley rope hoist to the ceiling to make lifting easier. I also want to install a shelf to have the fermenting bucket on top and the carboy on bottom. This will be better for racking for the secondary fermentation.
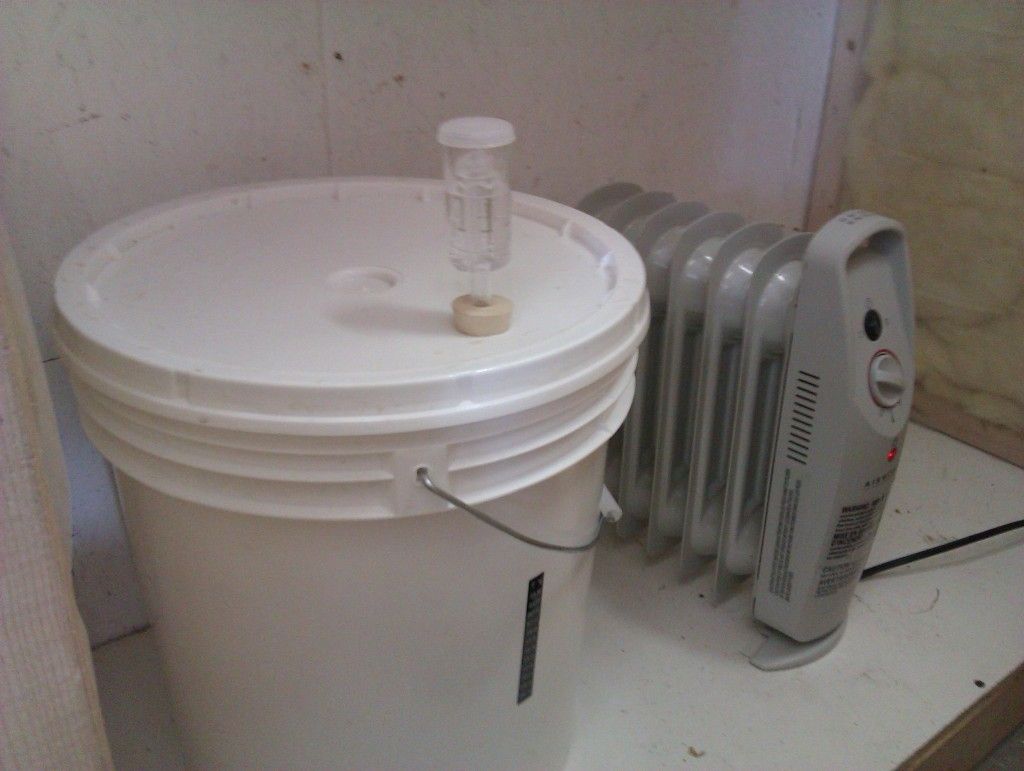
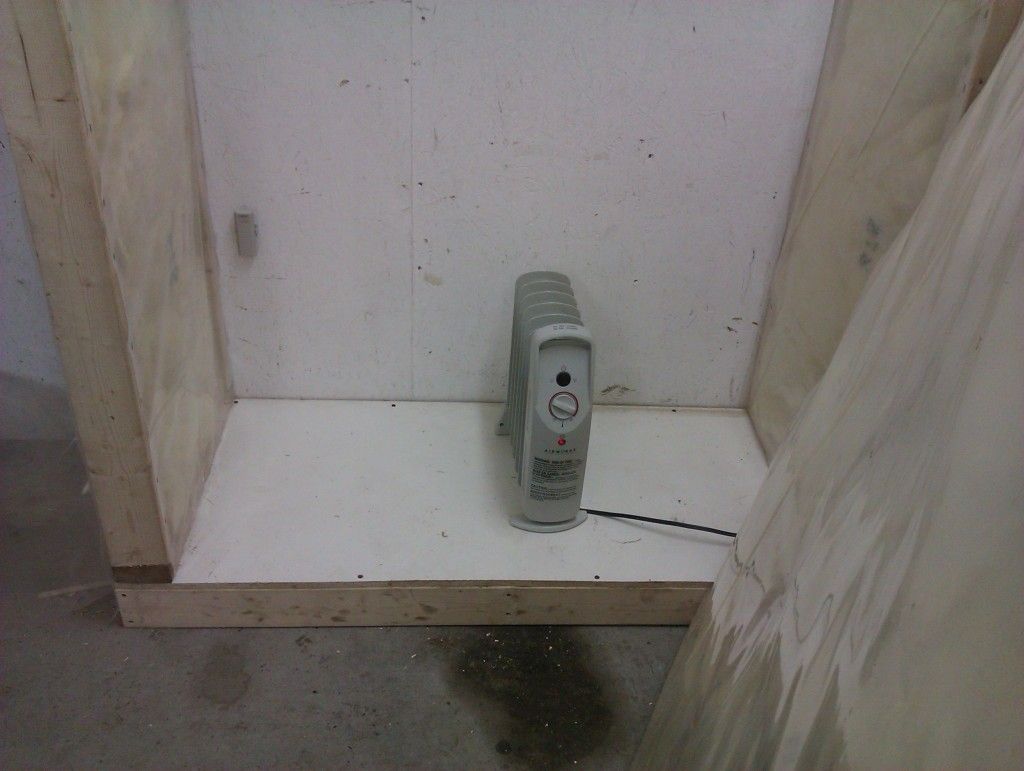
For heat I am using a small oil-filled radiator stlye heater. This one wasn't being used anymore in the house, so I claimed it for the brewshop. :)
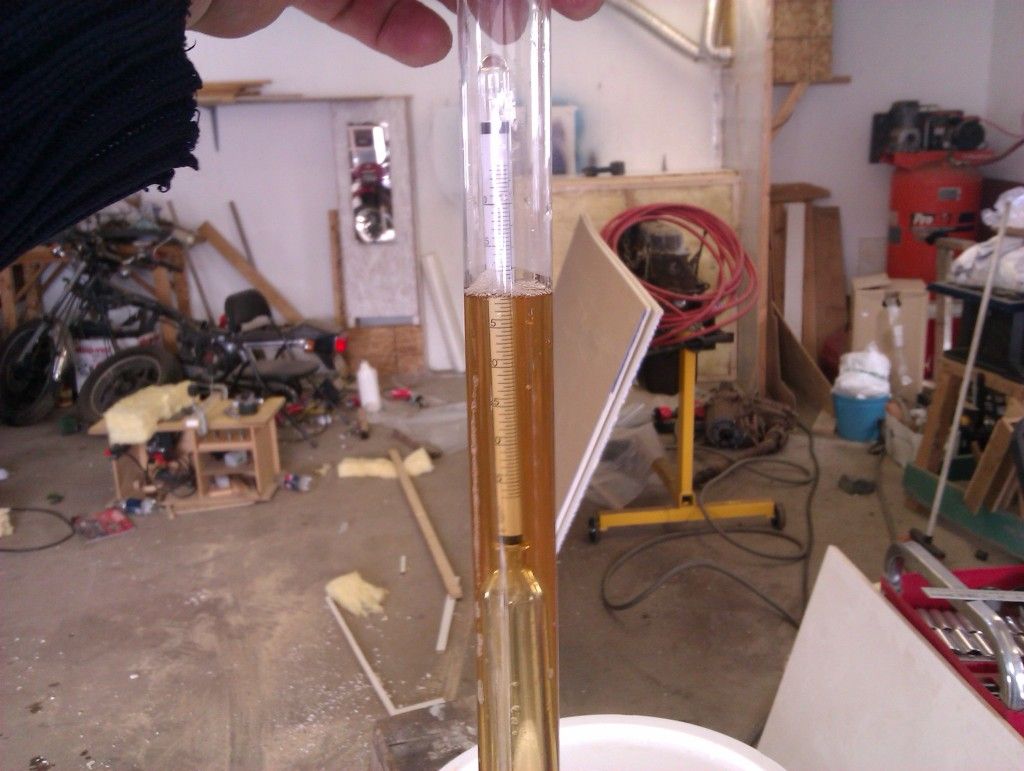
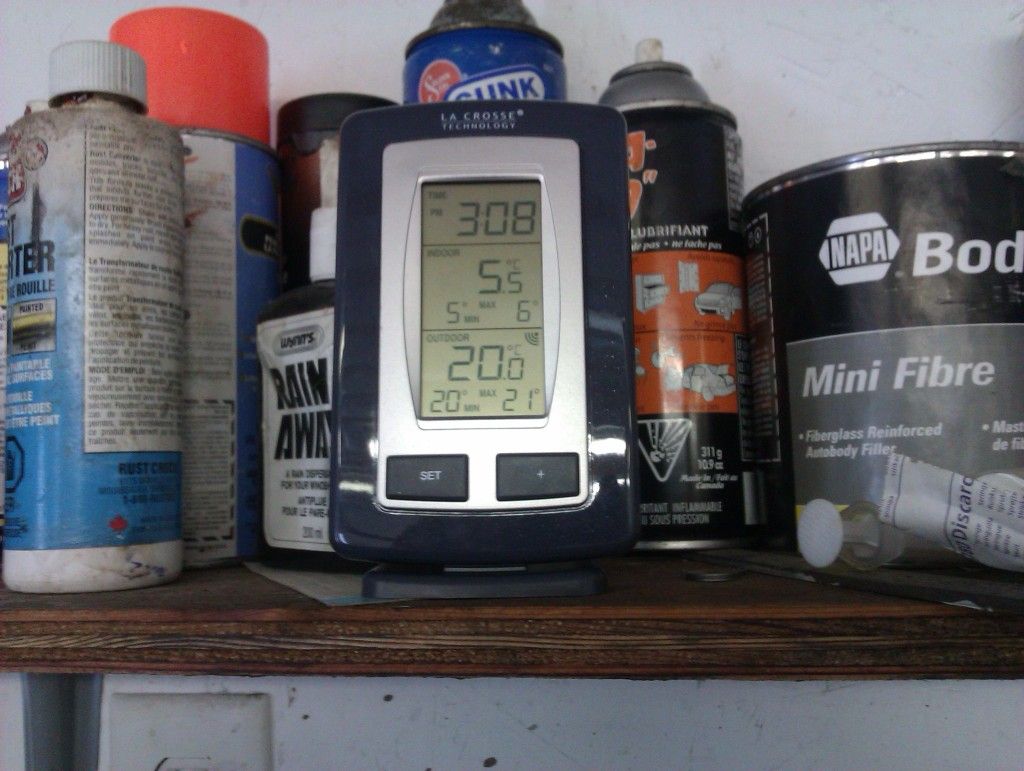
Also notice in the next pics I have a remote temperature sensor that was also on sale at CT this week.

Image

Image

So how did all work? ....not too bad. After a bit of tweaking with the heater, the range is from 18.8 degrees C to 21.7 C.
Nice and easy to monitor on the workbench shelf:
Image

Takes about an hour for a full cycle. Not too bad considering it's not finished yet. I want to install some weather stripping to help further insulate.

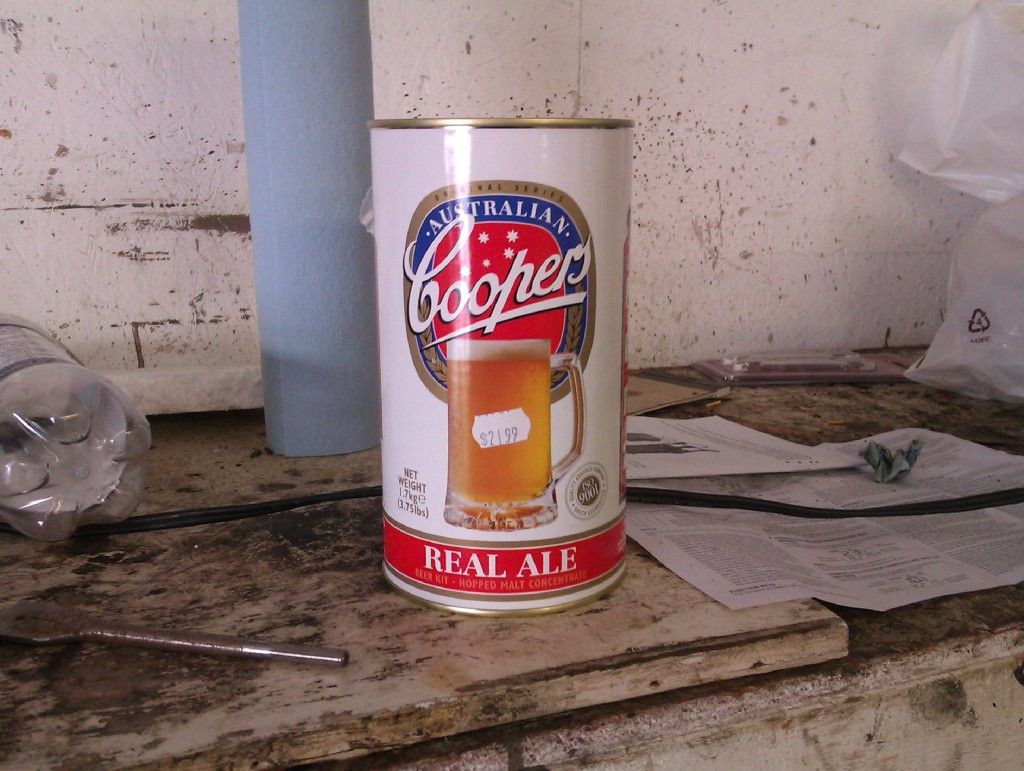
Next up in near future: My first batch with the Coopers extract.......
Some people can tell ya the square root of a pickle jar, but can't seem to figure out how to open it...

User avatar
NASH
CBA Award Winner
CBA Award Winner
Posts: 4085
Joined: Thu Jan 20, 2011 7:33 pm
Name: Nash
Location: Halifax, NS
Contact:

Re: Relic's Adventures into Homebrewing

Post by NASH » Tue Mar 20, 2012 6:28 pm

That all looks great! Well done :cheers2:

If it were me I'd beat the timer off with a big hammer :lol: :lol:

Also, primary fermentation can generate quite a bit of heat from energy expelled so you really should lower the temp in the fermentation chamber a bit. If you want a real fermentation temp of ~ 19c you may want to run the room at around 15c. It all depends on the vigor of fermentation though, a fast and furious ferment can go 5 - 6c above ambient, less vigor = less energy expelled over the same period = less heat generated :cheers2:

User avatar
BBrianBoogie
Verified User
Verified User
Posts: 779
Joined: Thu Oct 21, 2010 8:21 pm
Location: Halifax

Re: Relic's Adventures into Homebrewing

Post by BBrianBoogie » Tue Mar 20, 2012 7:10 pm

Looking good man. If you open up the junction box, you can jumper out the timer pretty easily. Couple inch piece of wire works nicely.

User avatar
sleepyjamie
Award Winner 5
Award Winner 5
Posts: 2482
Joined: Sun Jun 12, 2011 7:05 pm
Name: jamie
Location: Calgary

Re: Relic's Adventures into Homebrewing

Post by sleepyjamie » Tue Mar 20, 2012 7:32 pm

the only thing missing is beer! :spilly:
On Tap:
Falconers Galaxy IPA
Simcoe SMaSH
Topaz SMaSH
Cranberry Rye Saison
Monde Souterrain (Dark Saison)

User avatar
jeffsmith
Verified User
Verified User
Posts: 4922
Joined: Tue Apr 26, 2011 4:18 pm
Name: Jeff Smith
Location: Amherst, NS
Contact:

Re: Relic's Adventures into Homebrewing

Post by jeffsmith » Tue Mar 20, 2012 8:14 pm

Looks good Relic! You'll be brewing great beer before you know it!

User avatar
Relic
Registered User
Registered User
Posts: 58
Joined: Sun Mar 04, 2012 1:41 am

Re: Relic's Adventures into Homebrewing

Post by Relic » Tue Mar 20, 2012 8:29 pm

BBrianBoogie wrote:Looking good man. If you open up the junction box, you can jumper out the timer pretty easily. Couple inch piece of wire works nicely.
Gonna have to look into that...literally!
NASH wrote:That all looks great! Well done :cheers2:
<snip>
Also, primary fermentation can generate quite a bit of heat from energy expelled so you really should lower the temp in the fermentation chamber a bit. If you want a real fermentation temp of ~ 19c you may want to run the room at around 15c. .....<snip> :cheers2:
Thanx for the info.....I'll rectify accordingly.
sleepyjamie wrote:the only thing missing is beer! :spilly:
Gonna have to do something about that too me thinks!
Some people can tell ya the square root of a pickle jar, but can't seem to figure out how to open it...

User avatar
BrooklandBrewer
Award Winner 3
Award Winner 3
Posts: 176
Joined: Sat Feb 18, 2012 9:59 pm
Name: Andrew
Location: Brookland Brewing, Sydney, NS

Re: Relic's Adventures into Homebrewing

Post by BrooklandBrewer » Tue Mar 20, 2012 9:46 pm

Sweet timer contraption! Ever consider going on Dragon's Den with that invention? haha. Looks great man! :cheers:
Currently At Brookland Brewing, Sydney, NS:
In Kegs: Four Seas IPA, Belgian Witbier
In Carboys: Ordinary Bitter (Bitter Bonnette)
Bottled:
Next Brew: California Lager.

User avatar
akr71
Award Winner 4
Award Winner 4
Posts: 2644
Joined: Fri Sep 24, 2010 7:18 pm
Name: Andy
Location: Amherst, NS

Re: Relic's Adventures into Homebrewing

Post by akr71 » Tue Mar 20, 2012 10:34 pm

:thumbup:
Andy
"Now son, you don't want to drink beer. That's for Daddies, and kids with fake IDs." - Homer J. Simpson

User avatar
mr x
Mod Award Winner
Mod Award Winner
Posts: 13764
Joined: Fri Sep 24, 2010 5:30 pm
Location: Halifax/New Glasgow

Re: Relic's Adventures into Homebrewing

Post by mr x » Wed Mar 21, 2012 5:48 am

Very good. Cardboard trick reminds me of the old vlt's. Jam the play button down with a toothpick, and it automatically takes all your money hands free, lol.
At Alexander Keith's we follow the recipes first developed by the great brewmaster to the absolute letter. :wtf:

User avatar
Tony L
Award Winner 10
Award Winner 10
Posts: 1848
Joined: Fri Jul 15, 2011 8:04 pm
Location: Heart's Delight, NL

Re: Relic's Adventures into Homebrewing

Post by Tony L » Wed Mar 21, 2012 8:44 am

Looks good so far Darren, but I really don't think you'll need all
that fire power fueling heat for your fermentation. Lagers in the winter
and ales in the summer with that set up would probably be good.

User avatar
homebrewcrew
Verified User
Verified User
Posts: 636
Joined: Wed Dec 28, 2011 7:41 pm
Name: Brandon
Location: Tantallon

Re: Relic's Adventures into Homebrewing

Post by homebrewcrew » Wed Mar 21, 2012 9:15 am

There is a link on the canadian tire site. If you go to the turkey fryer and click on questions, someone asked if there was a way to bypass the timer. There is a link on the site explaining how to do it.
JUST BREW IT

User avatar
Relic
Registered User
Registered User
Posts: 58
Joined: Sun Mar 04, 2012 1:41 am

Re: Relic's Adventures into Homebrewing

Post by Relic » Wed Mar 21, 2012 12:22 pm

Thanks for the info so far ..... ;)

Eye of newt, toe of frog....
Image

Magic potion is a brewing...

Ok, ....rewind a bit. First I sanitized my primary fermentor, air lock, and few other things. Not having any Star-san (no-rinse sanitzer), I had to use bleach method. 8 gallons of water plus 120 ml of bleach. let everything soak for 30 minutes then rinsed with warm water. During this I boiled 2.5 gallons of water. Then cooled the pot in the snow a bit then threw into my fermenting bucket and covered.

Next: Then I brought to boil another 2.5 gallons of water and turned off the heat.. Then I added 720 grams of corn sugar (1 kg bag minus 180 g put aside for priming sugar). Along with that I threw in a pre-warmed can of this:
Image

Man, is that stuff ever thick...makes molasses look like water!

Ok...fired up the burner and bought everything to a boil again once I was sure it was all mixed up real well. Once the mixture reached the hot-break you get a real good boil foam happening. Gotta stand by the controls at this point. Luckily I had lots of head space in the pot.With the heat now reduced I continued boiling for another 15 minutes.
After that I placed the pot in a cold water bath to quickly bring the temperature down :
Image

Lots of snow and ice around to keep adding to the bath. (time for that snow and ice to go now tho....)
Once cooled I added that to the 2.5 gallons of water that was already in the fermentor. Put the lid on and gave it a good shaking for about 3 minutes to aerate the wort. Nice and bubbly! Guess I got it aerated enough...
Image

Drew a sample for hydrometer testing:
Image

Nice color. Specific gravity was 1.041. Decent number I think. I guess I can expect around 5% ABV.

Placed fermentor in my special room, pitched the yeast, placed lid and finally installed the airlock. Here she is all snuggled away for a while.:
Image

Now comes the hard part...waiting.....

All in all, I think this morning was a success. Won't really know for sure until it's ready for consumption.
Some people can tell ya the square root of a pickle jar, but can't seem to figure out how to open it...

User avatar
Relic
Registered User
Registered User
Posts: 58
Joined: Sun Mar 04, 2012 1:41 am

Re: Relic's Adventures into Homebrewing

Post by Relic » Sun Mar 25, 2012 10:58 am

So this morning I made my wort chiller.

Picked up 20 feet of 3/8 soft copper tubing. Ideally 25 feet of 1/2 would be what you need I think, but that's all I could acquire in my neighborhood. May have to add another 20 feet later on.

Done a little bit of coil shaping to fit inside the brewpot along with some bending with a tube bender to come up with this:
Image

Also flared the ends a bit to help keep hose in place. Bought ten feet of 3/8 ID PVC braided hose and a barbed female garden hose adapter to fit from Princess Auto. Just need some hose clamps to finish it off.
Image

Inside shot:
Image

Now I can hook up the garden hose and run water thru the coils to cool down the wort as fast as possible once boil procedure is complete. No more ice baths.

Nice Sunday morning project. :)
Some people can tell ya the square root of a pickle jar, but can't seem to figure out how to open it...

User avatar
mr x
Mod Award Winner
Mod Award Winner
Posts: 13764
Joined: Fri Sep 24, 2010 5:30 pm
Location: Halifax/New Glasgow

Re: Relic's Adventures into Homebrewing

Post by mr x » Sun Mar 25, 2012 11:04 am

Well done. :thumbup:
At Alexander Keith's we follow the recipes first developed by the great brewmaster to the absolute letter. :wtf:

User avatar
Relic
Registered User
Registered User
Posts: 58
Joined: Sun Mar 04, 2012 1:41 am

Homemade Drying Racks

Post by Relic » Mon Mar 26, 2012 2:23 pm

This morning's project was to make some drying racks. Had three of these coke bottle trays kicking around :
Image

Little bit of cutting with a 1 1/2 " hole saw and voila, nuttin' to it. :
Image

Each tray has a two dozen capacity.

Flip her back over and I can also use it for carrying the bottles as well. 2x4 placed along side to keep it all snug. :
Image
Some people can tell ya the square root of a pickle jar, but can't seem to figure out how to open it...

User avatar
jeffsmith
Verified User
Verified User
Posts: 4922
Joined: Tue Apr 26, 2011 4:18 pm
Name: Jeff Smith
Location: Amherst, NS
Contact:

Re: Relic's Adventures into Homebrewing

Post by jeffsmith » Mon Mar 26, 2012 2:43 pm

Very slick for a drying rack! Much more stable than a bottle tree.

User avatar
thirdeye
Verified User
Verified User
Posts: 146
Joined: Mon Jan 16, 2012 9:55 pm
Name: J

Re: Relic's Adventures into Homebrewing

Post by thirdeye » Mon Mar 26, 2012 4:44 pm

I'd switch up to 500ml bottles; washing, sanitizing and bottling those little ones sucks. The best would be swing top (16 Grolsh bottles fit perfectly in a milk crate) also beware the clear bottles... you can skunk a batch with those.

User avatar
Relic
Registered User
Registered User
Posts: 58
Joined: Sun Mar 04, 2012 1:41 am

Re: Relic's Adventures into Homebrewing

Post by Relic » Mon Mar 26, 2012 5:08 pm

thirdeye wrote:I'd switch up to 500ml bottles; washing, sanitizing and bottling those little ones sucks. The best would be swing top (16 Grolsh bottles fit perfectly in a milk crate) also beware the clear bottles... you can skunk a batch with those.
Yeah would be nice to have a bunch of bigger bottles..... but unfortunately I don't have that luxury. I have a few however not emptied yet...Hobgoblin, London Pride, plus a couple 750 ml from Yellowbelly. The clear bottles I am gonna try my best to avoid light exposure (vampire beer?). Plus gonna cap some twist-offs also, see how that works for me. Seems some people have no problems and other have lots.
Some people can tell ya the square root of a pickle jar, but can't seem to figure out how to open it...

User avatar
Jimmy
Site Admin Award Winner
Posts: 6984
Joined: Wed Sep 22, 2010 6:35 pm
Location: Halifax, NS

Re: Relic's Adventures into Homebrewing

Post by Jimmy » Mon Mar 26, 2012 5:13 pm

Check with the recycle depot, you can normally score some bottles there

User avatar
thirdeye
Verified User
Verified User
Posts: 146
Joined: Mon Jan 16, 2012 9:55 pm
Name: J

Re: Relic's Adventures into Homebrewing

Post by thirdeye » Mon Mar 26, 2012 6:51 pm

Jimmy wrote:Check with the recycle depot, you can normally score some bottles there
I get my swing-tops from a recycler down the street, $0.15 a bottle and if I buy 16 at a time they usually throw in the milk crate! goodbye crown caps!

User avatar
Tony L
Award Winner 10
Award Winner 10
Posts: 1848
Joined: Fri Jul 15, 2011 8:04 pm
Location: Heart's Delight, NL

Re: Relic's Adventures into Homebrewing

Post by Tony L » Mon Mar 26, 2012 7:12 pm

I used the normal beer bottles used by molsons et al here for years before I went with kegs. Never had a hitch using them.
Relic, I see we are going to have to get you into drinking a better class of beer.
Looking good so far though.

User avatar
Relic
Registered User
Registered User
Posts: 58
Joined: Sun Mar 04, 2012 1:41 am

Re: Relic's Adventures into Homebrewing

Post by Relic » Mon Mar 26, 2012 8:57 pm

Tony L wrote:I used the normal beer bottles used by molsons et al here for years before I went with kegs. Never had a hitch using them.
Relic, I see we are going to have to get you into drinking a better class of beer.
Looking good so far though.
Haha..yeah. I'm working on it.

Tried this one the other day (wasn't overly impressed):
Image

But I really enjoyed this, (so far it's my favorite):
Image

Plus a few more samples remaining to try:
Image

Actually, I have tried the Guinness many times before, I ain't that far back in the woods. Tried the Wexford Wheat tonight, enjoyed that. ;)
Some people can tell ya the square root of a pickle jar, but can't seem to figure out how to open it...

User avatar
bluenose
Verified User
Verified User
Posts: 1984
Joined: Tue Dec 20, 2011 8:49 pm
Location: New Glasgow

Re: Relic's Adventures into Homebrewing

Post by bluenose » Mon Mar 26, 2012 9:04 pm

I enjoyed the old speckled hen
This is my signature. There are many like it, but this one is mine.

User avatar
Tony L
Award Winner 10
Award Winner 10
Posts: 1848
Joined: Fri Jul 15, 2011 8:04 pm
Location: Heart's Delight, NL

Re: Relic's Adventures into Homebrewing

Post by Tony L » Tue Mar 27, 2012 8:30 am

God, I love London Pride as well as all you have pictured. If you like Guinness, try the St. John's Stout by YellowBelly. I think it is better than Guinness.
I picked up some left overs from the Beer Fest yesterday at the liquor store.
I got, Krombacher Dark, Courage Directors, Ossian ale, Sheppard's Neame Spitfire premium Kentish Ale, Inveralmond Blackfriar Scottish Ale, Okanagan Spring Pale Ale, and Unibroqe Noir de Chambley.

User avatar
Relic
Registered User
Registered User
Posts: 58
Joined: Sun Mar 04, 2012 1:41 am

Making the Mash Tun

Post by Relic » Tue Mar 27, 2012 5:27 pm

Mash Tun: A vessel used in the mashing process to convert the starches in crushed grains into sugars for fermentation.

Most home brewers use the cooler type, which is what I went with. I thought about using a copper or CPVC manifold, but I chose to go with the stainless braid instead.

Stainless braid is is just the outside covering of a water supply hose. Here's the hose before chopping:
Image

Then using a hacksaw to chop both ends off, the inner liner can be removed from the braid. You end up with this:
Image

OK, next step is to remove the drain plug from the cooler, keep the rubber seal that's on the inside.:
Image

Now, with a bunch of fittings and stainless steel washers a ball valve can be attached into the hole. The washers provide a snug fit to the inside seal to prevent leakage.
Here's what you end up with:
Image

Using the hose barb inside you can now attach the braid material.:
Image

On the other end of the braid I clamped a plug. Now we have a nice stainless steel strainer made.
Image

All the brass fittings were pickled in a solution of 2 parts vinegar to one part hydrogen peroxide for around 6 minutes. This removes any surface lead of the brass.

Just gotta give the cooler a good cleaning and then I am ready for my all-grain brew to happen. Hopefully in the next day or two. :)
Some people can tell ya the square root of a pickle jar, but can't seem to figure out how to open it...

Post Reply

Return to “General Homebrew Discussion”

Who is online

Users browsing this forum: No registered users and 1 guest